
If you’re involved in the world of business, you understand the importance of making a memorable first impression. Business cards are a classic tool for networking and establishing professional connections. To ensure your business cards look polished and professional, it’s crucial to understand the concept of bleed and how it applies to your design. In this article, we will delve into the topic of standard bleed for business cards, exploring its significance, dimensions, and best practices. Whether you’re designing your own business cards or working with a professional printer, this guide will equip you with the knowledge you need to create impressive and high-quality business cards.
What is Bleed?
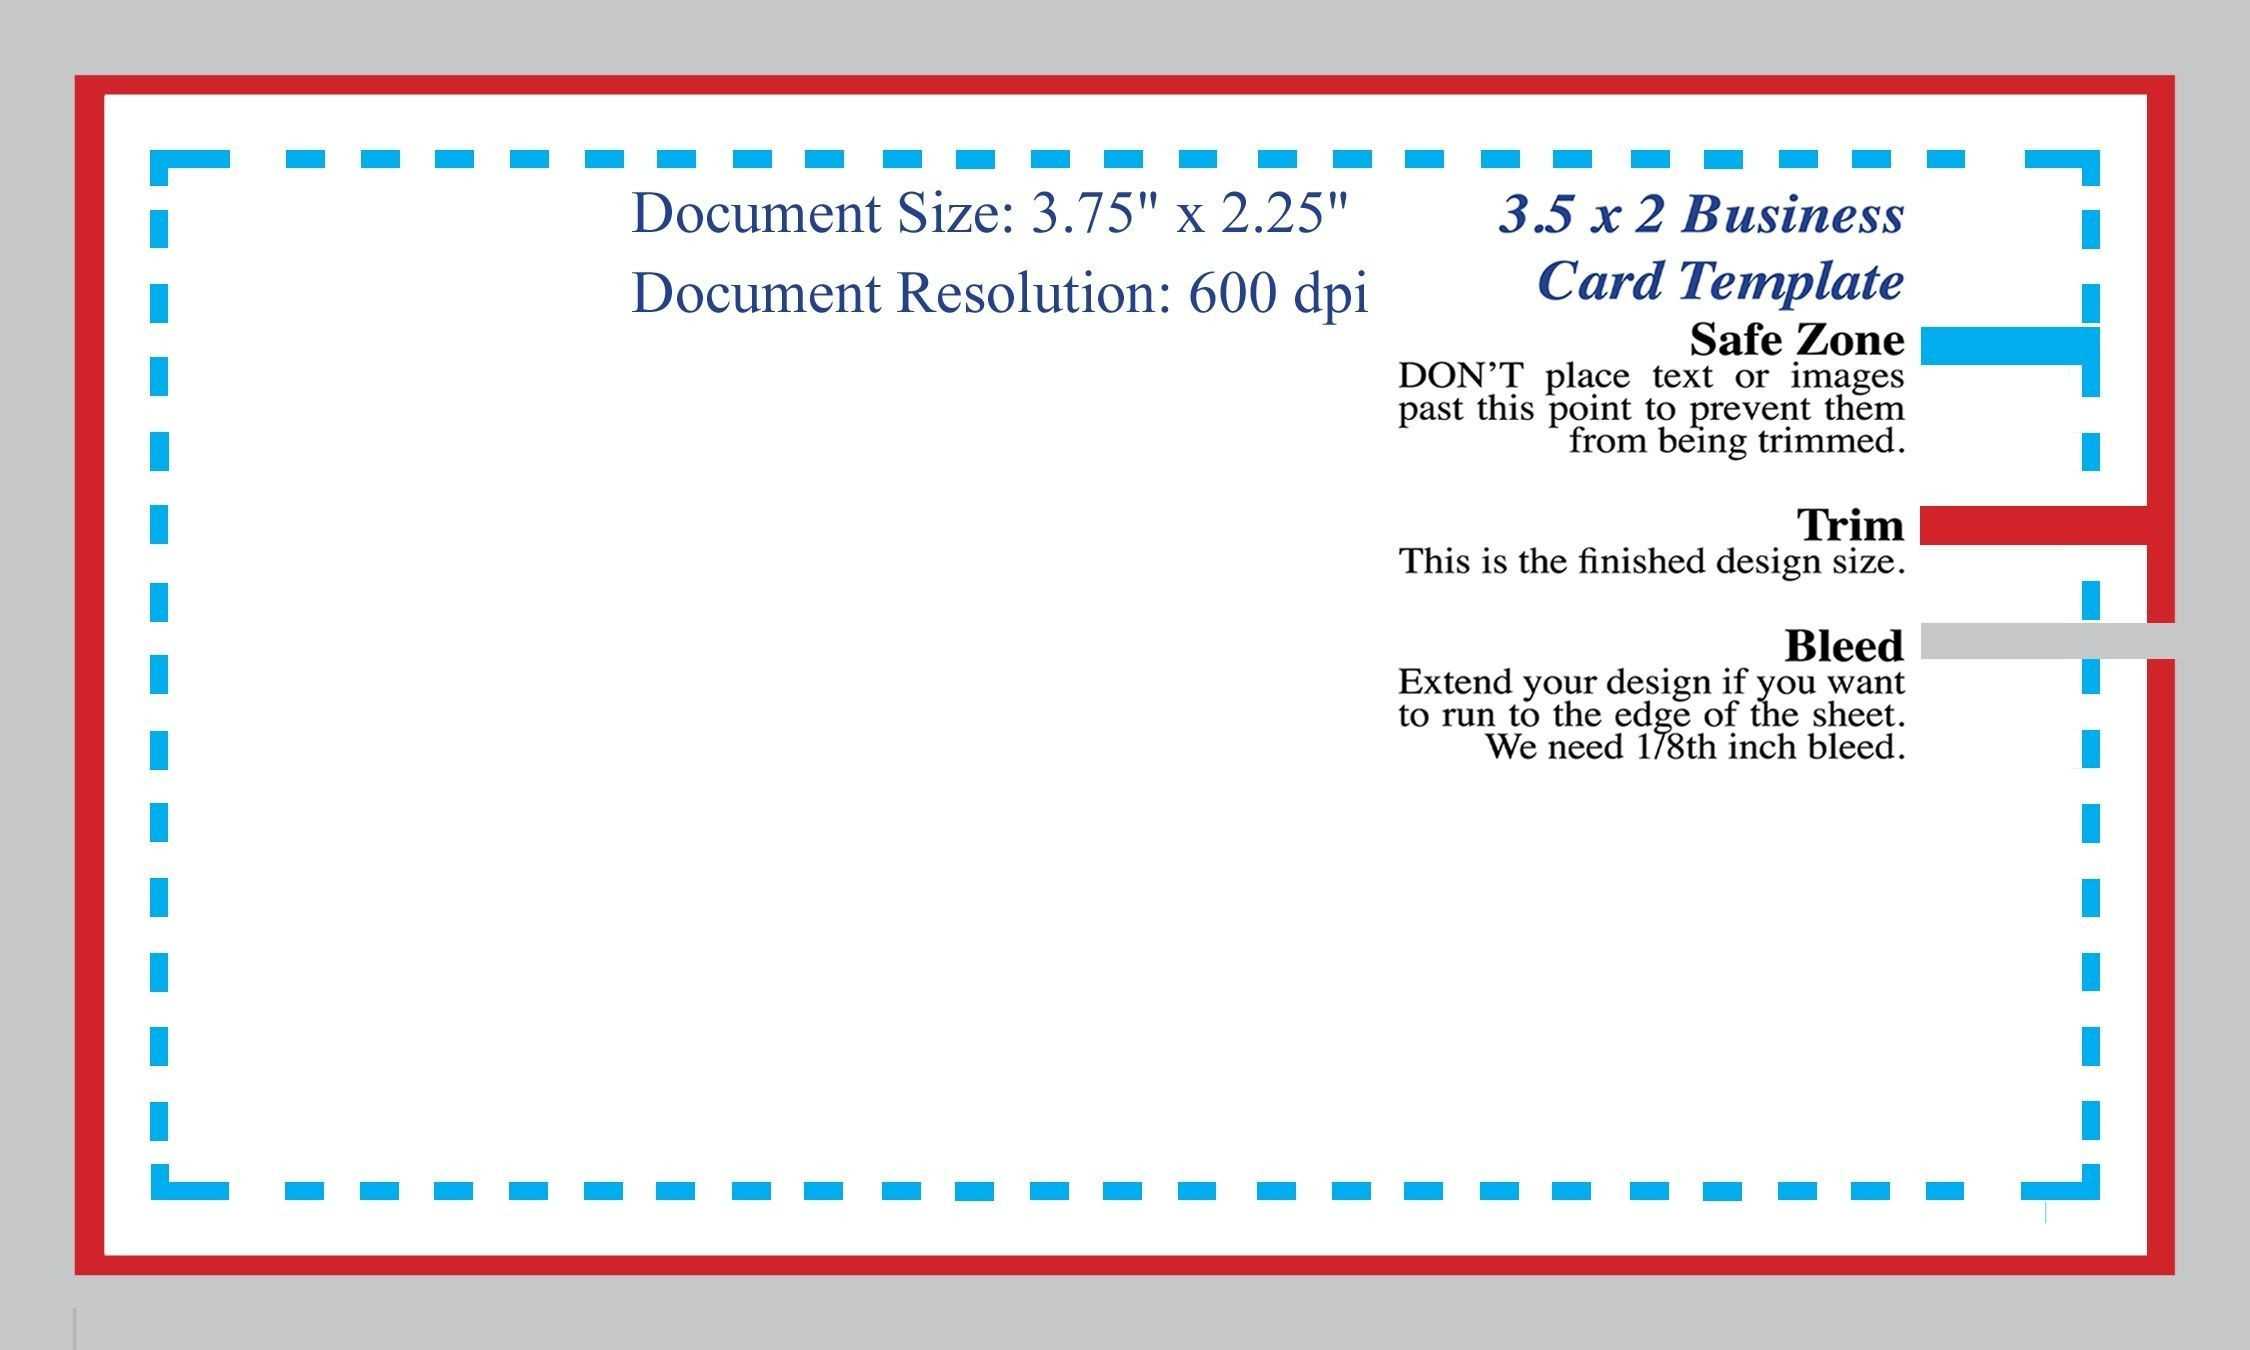
Bleed refers to the area of a document that extends beyond its final trim size. It allows the design to extend all the way to the edge of the finished product, ensuring that there are no unsightly white borders or gaps. In the printing process, bleed provides a safety net, compensating for any slight variations during trimming.
For business cards, having a proper bleed is essential to achieve a clean and professional look. Without bleed, there is a risk of ending up with business cards that have inconsistent borders or awkward white spaces. To avoid this, it’s crucial to adhere to the standard bleed dimensions.
Standard Bleed Dimensions for Business Cards
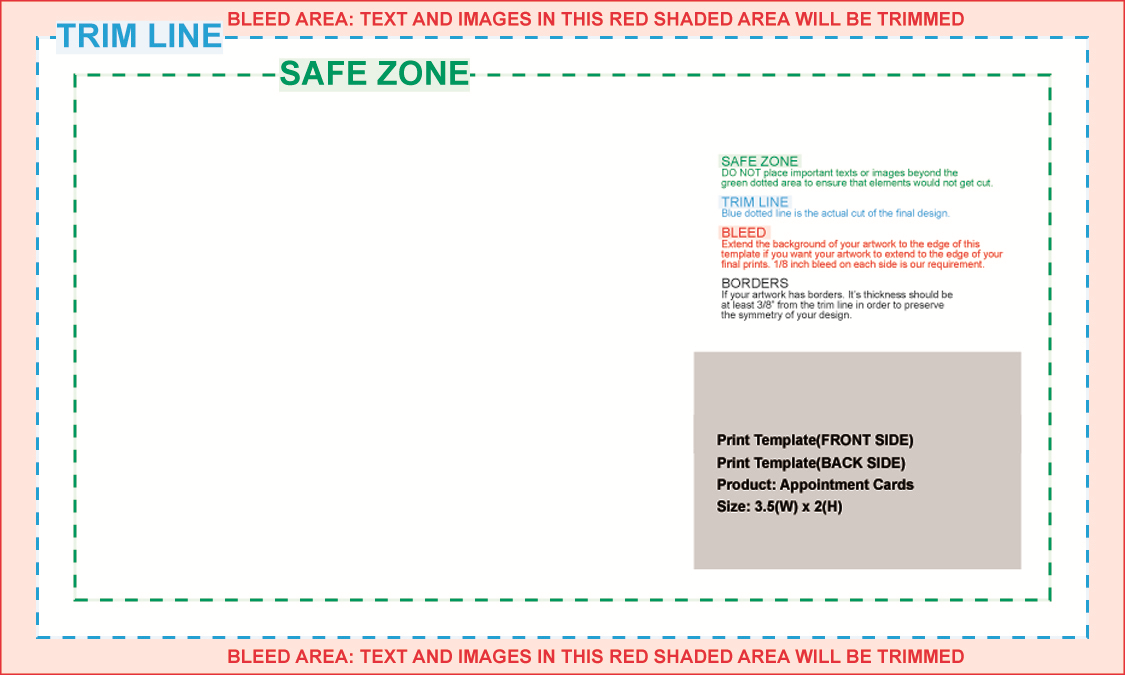
The standard bleed dimensions for most business cards are typically 0.125 inches (3.175mm) on all sides. This ensures that there is ample room for trimming, accommodating any shifts or variations in the printing process. Keep in mind that these dimensions may vary depending on the specific print shop or printer you are working with. It’s always recommended to consult the printing guidelines provided by your printer to ensure your design meets their requirements.
Best Practices for Designing Business Cards with Bleed
Now that you understand the importance of bleed and the standard dimensions for business cards, let’s explore some best practices for designing business cards with bleed:
1. Use a Design Software
To create business cards with bleed, it’s crucial to use a design software that supports this feature. Popular design software like Adobe Photoshop, Illustrator, or InDesign include options to add bleed to your document, typically during the setup or creation phase. By using the appropriate design software, you can easily incorporate the necessary bleed dimensions into your business card design.
2. Set Up the Document with Bleed
When setting up your document, make sure to include the proper bleed dimensions. If you’re using Adobe InDesign, for example, you can enter the bleed dimensions in the “Bleed and Slug” section during the document setup process. By doing this, you establish the correct canvas size, allowing your design to extend beyond the final trim size.
3. Extend Your Design to the Bleed Area
Once your document is set up with the proper bleed dimensions, it’s time to extend your design to the bleed area. Ensure that important elements, such as text, logos, or images, are not placed too close to the trim edge. Keep in mind that anything too close to the edge may get trimmed off during the final production process. To prevent this, it’s recommended to keep essential elements at least 0.125 inches (3.175mm) away from the trim line.
4. Check File Resolution and Color Mode
To maintain the highest print quality, it’s crucial to set your document’s resolution to at least 300 dots per inch (DPI). This ensures that your design appears crisp and clear when printed. Additionally, most printers require designs to be in the CMYK color mode for optimal printing. Before submitting your design for printing, double-check that your file is in the correct resolution and color mode.
5. Export and Review Your Design
Once your business card design is complete and ready for printing, it’s important to export a final print-ready file. When exporting, make sure to include the bleed area, ensuring it extends beyond the trim line. Export your file as a high-resolution PDF to preserve the design elements and formatting.
Before sending your design off for printing, be sure to review it one final time. Pay attention to the placement of essential elements, making certain that they are within the safe zone and not too close to the trim edges. Double-check for any spelling errors, typos, or design inconsistencies. Taking the time to thoroughly review your business card design can save you from potential printing mishaps.
Conclusion

Understanding the concept of bleed and incorporating it into your business card design is essential for achieving a polished and professional look. By adhering to the standard bleed dimensions, using appropriate design software, and following best practices, you can ensure that your business cards stand out from the crowd. Remember to review the printing guidelines provided by your specific printer to confirm their bleed requirements. Following these guidelines will help you create business cards that make a lasting impression, leaving a positive impact on your potential clients and contacts. So, don’t overlook the significance of bleed; instead, use it to your advantage and elevate the overall quality of your business cards.
Ethan is a branding enthusiast and a master of storytelling. With a background in advertising, he leverages his expertise to explore the art of graphic design and its impact on business. In his free time, Ethan enjoys photography and capturing the world’s visual intricacies.