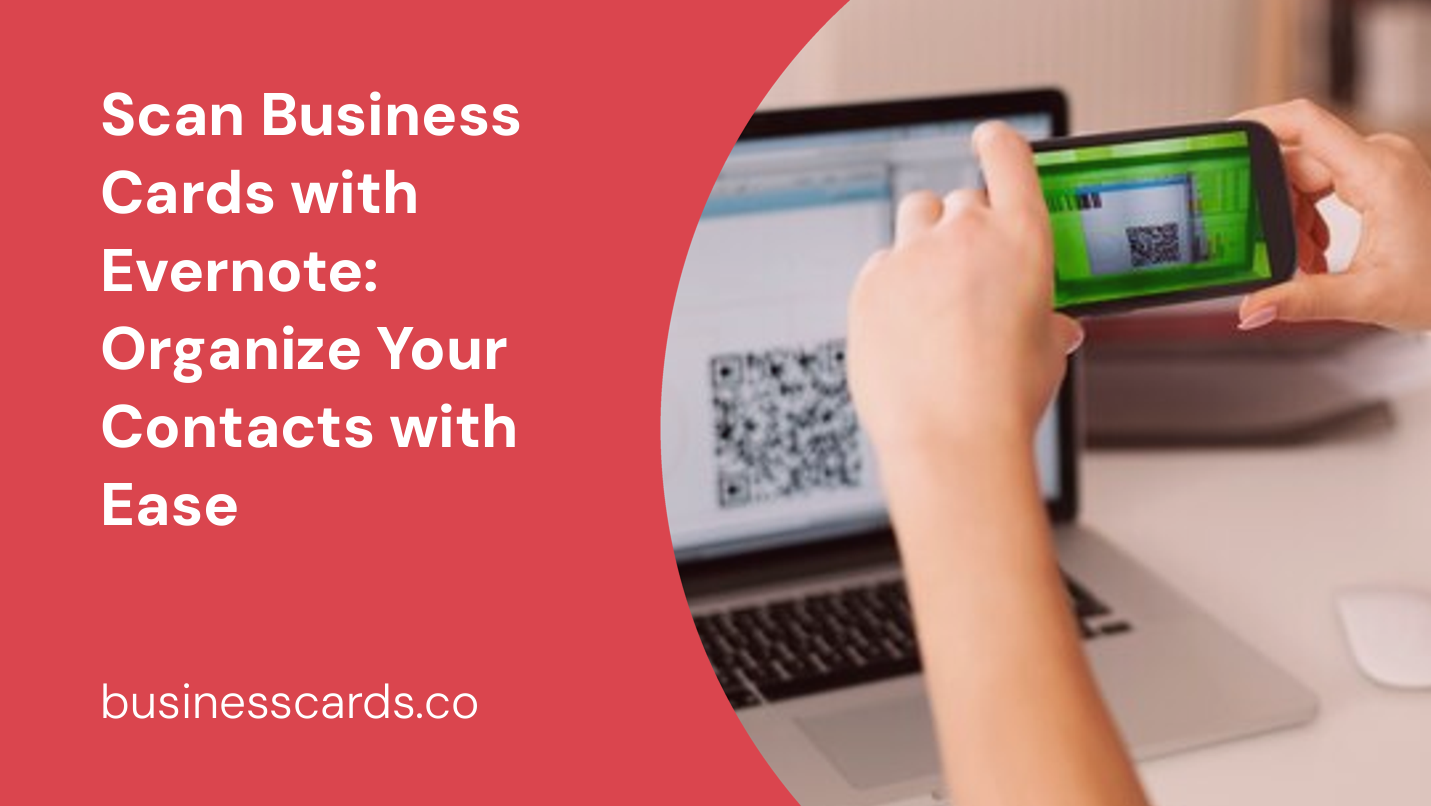
Are you tired of dealing with stacks of business cards cluttering your desk, or worse, losing important contact information? With the help of Evernote, a powerful note-taking and organization app, you can streamline the process of scanning and organizing business cards. In this article, we will explore how to effectively scan business cards using Evernote and how it can revolutionize the way you manage your contacts.
Why Digitize Business Cards?
In today’s digital age, maintaining paper business cards can be cumbersome and inconvenient. They can easily get misplaced or damaged, and manually entering contact information into your address book is time-consuming. By digitizing your business cards with Evernote, you can free up physical space, easily search for contacts, and have all your important connections accessible on any device.
Step 1: Download and Set Up Evernote

If you haven’t done so already, start by downloading Evernote onto your preferred device. Evernote is available for both desktop and mobile platforms, making it convenient for scanning business cards on the go. Once downloaded, launch the app and create an account or sign in to your existing one.
Step 2: Prepare Your Business Cards
Before scanning your business cards, ensure they are in good condition and free from any dirt or smudges that could potentially hinder the scanning process. Straighten out any creases and remove any loose papers or objects that may be attached to the cards. Having your business cards in optimal condition will help improve the accuracy of the scan.
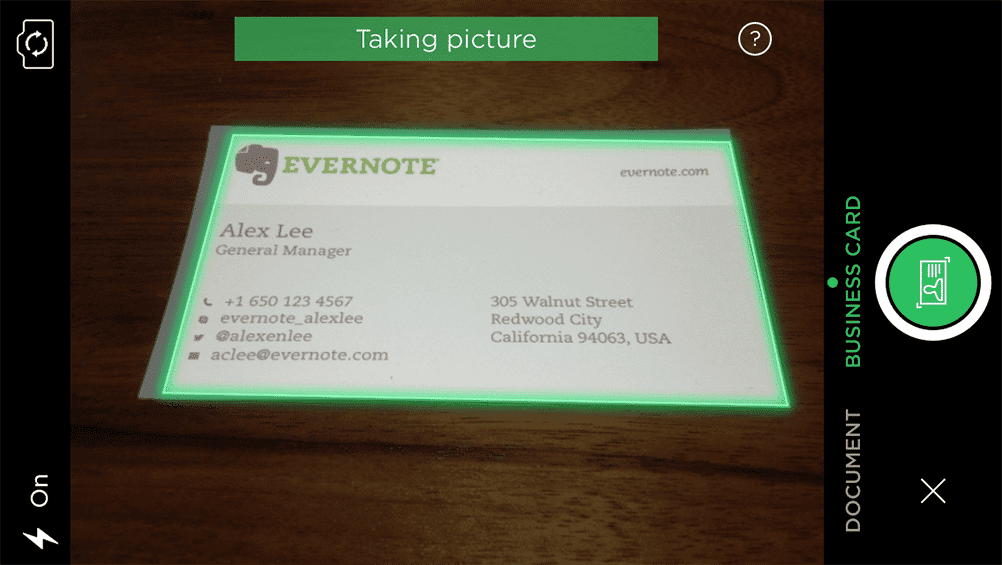
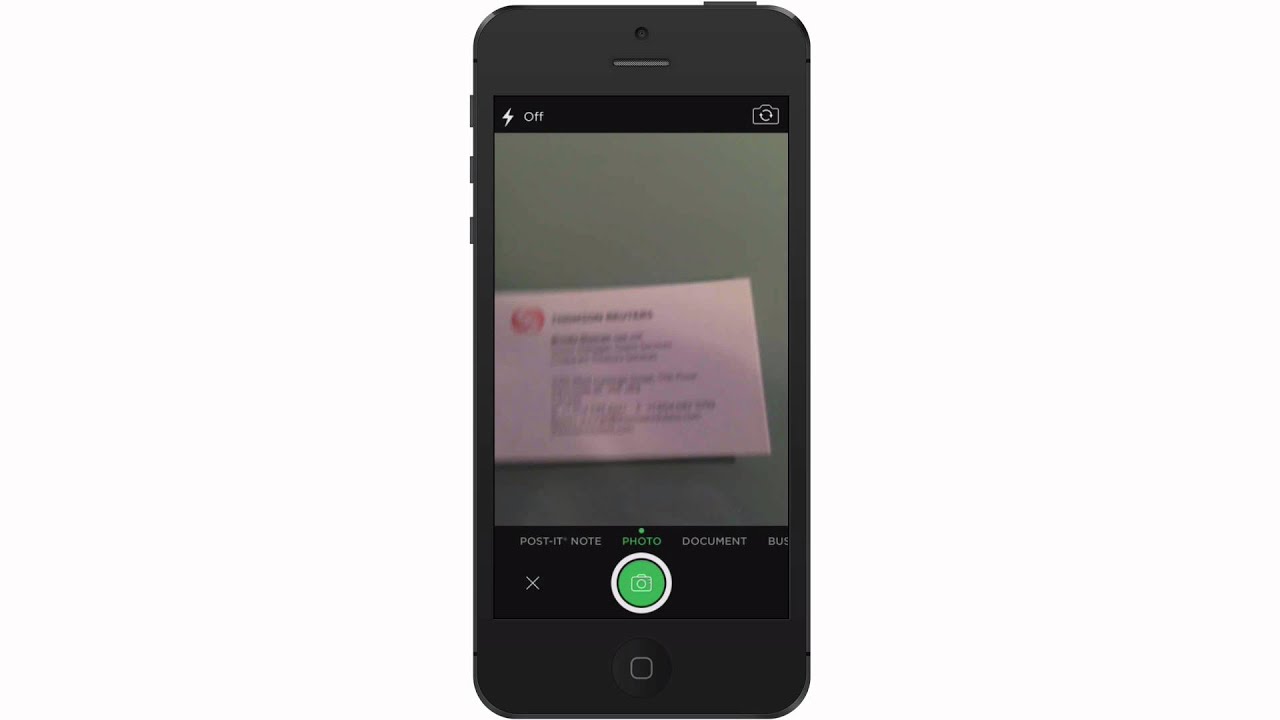
Step 3: Scan Business Cards with Evernote
Now that you have Evernote set up and your business cards prepared, it’s time to start scanning. In Evernote, navigate to the camera mode by clicking on the camera icon located on the bottom menu. Align the business card within the camera viewfinder, ensuring all relevant contact information is visible and well-lit.
Once the card is properly aligned, Evernote’s powerful scanning technology will automatically capture the image and initiate the OCR (Optical Character Recognition) process. This process converts the scanned text into editable and searchable content.
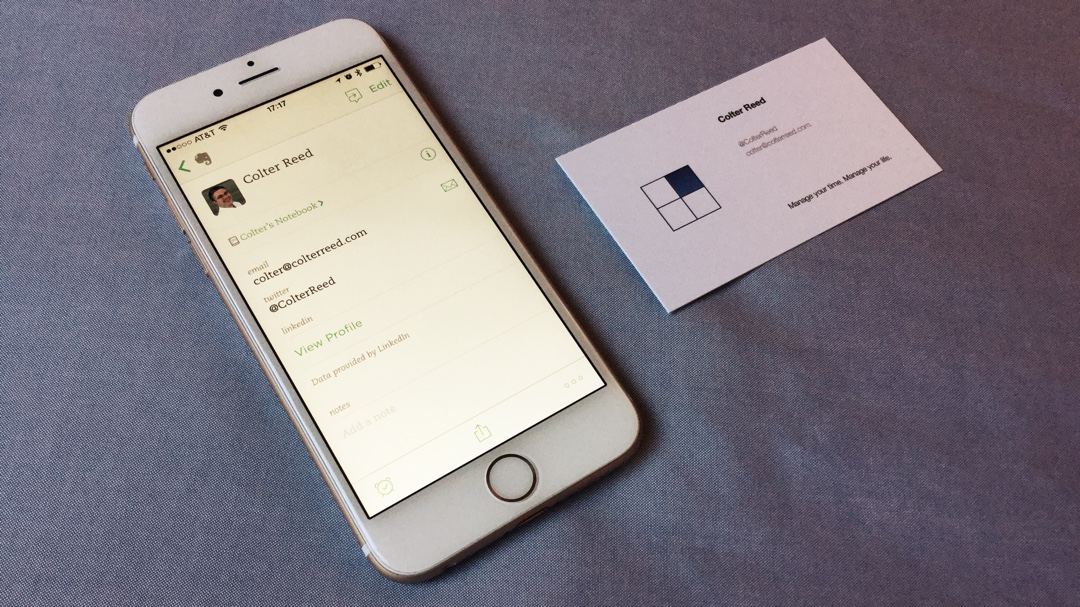
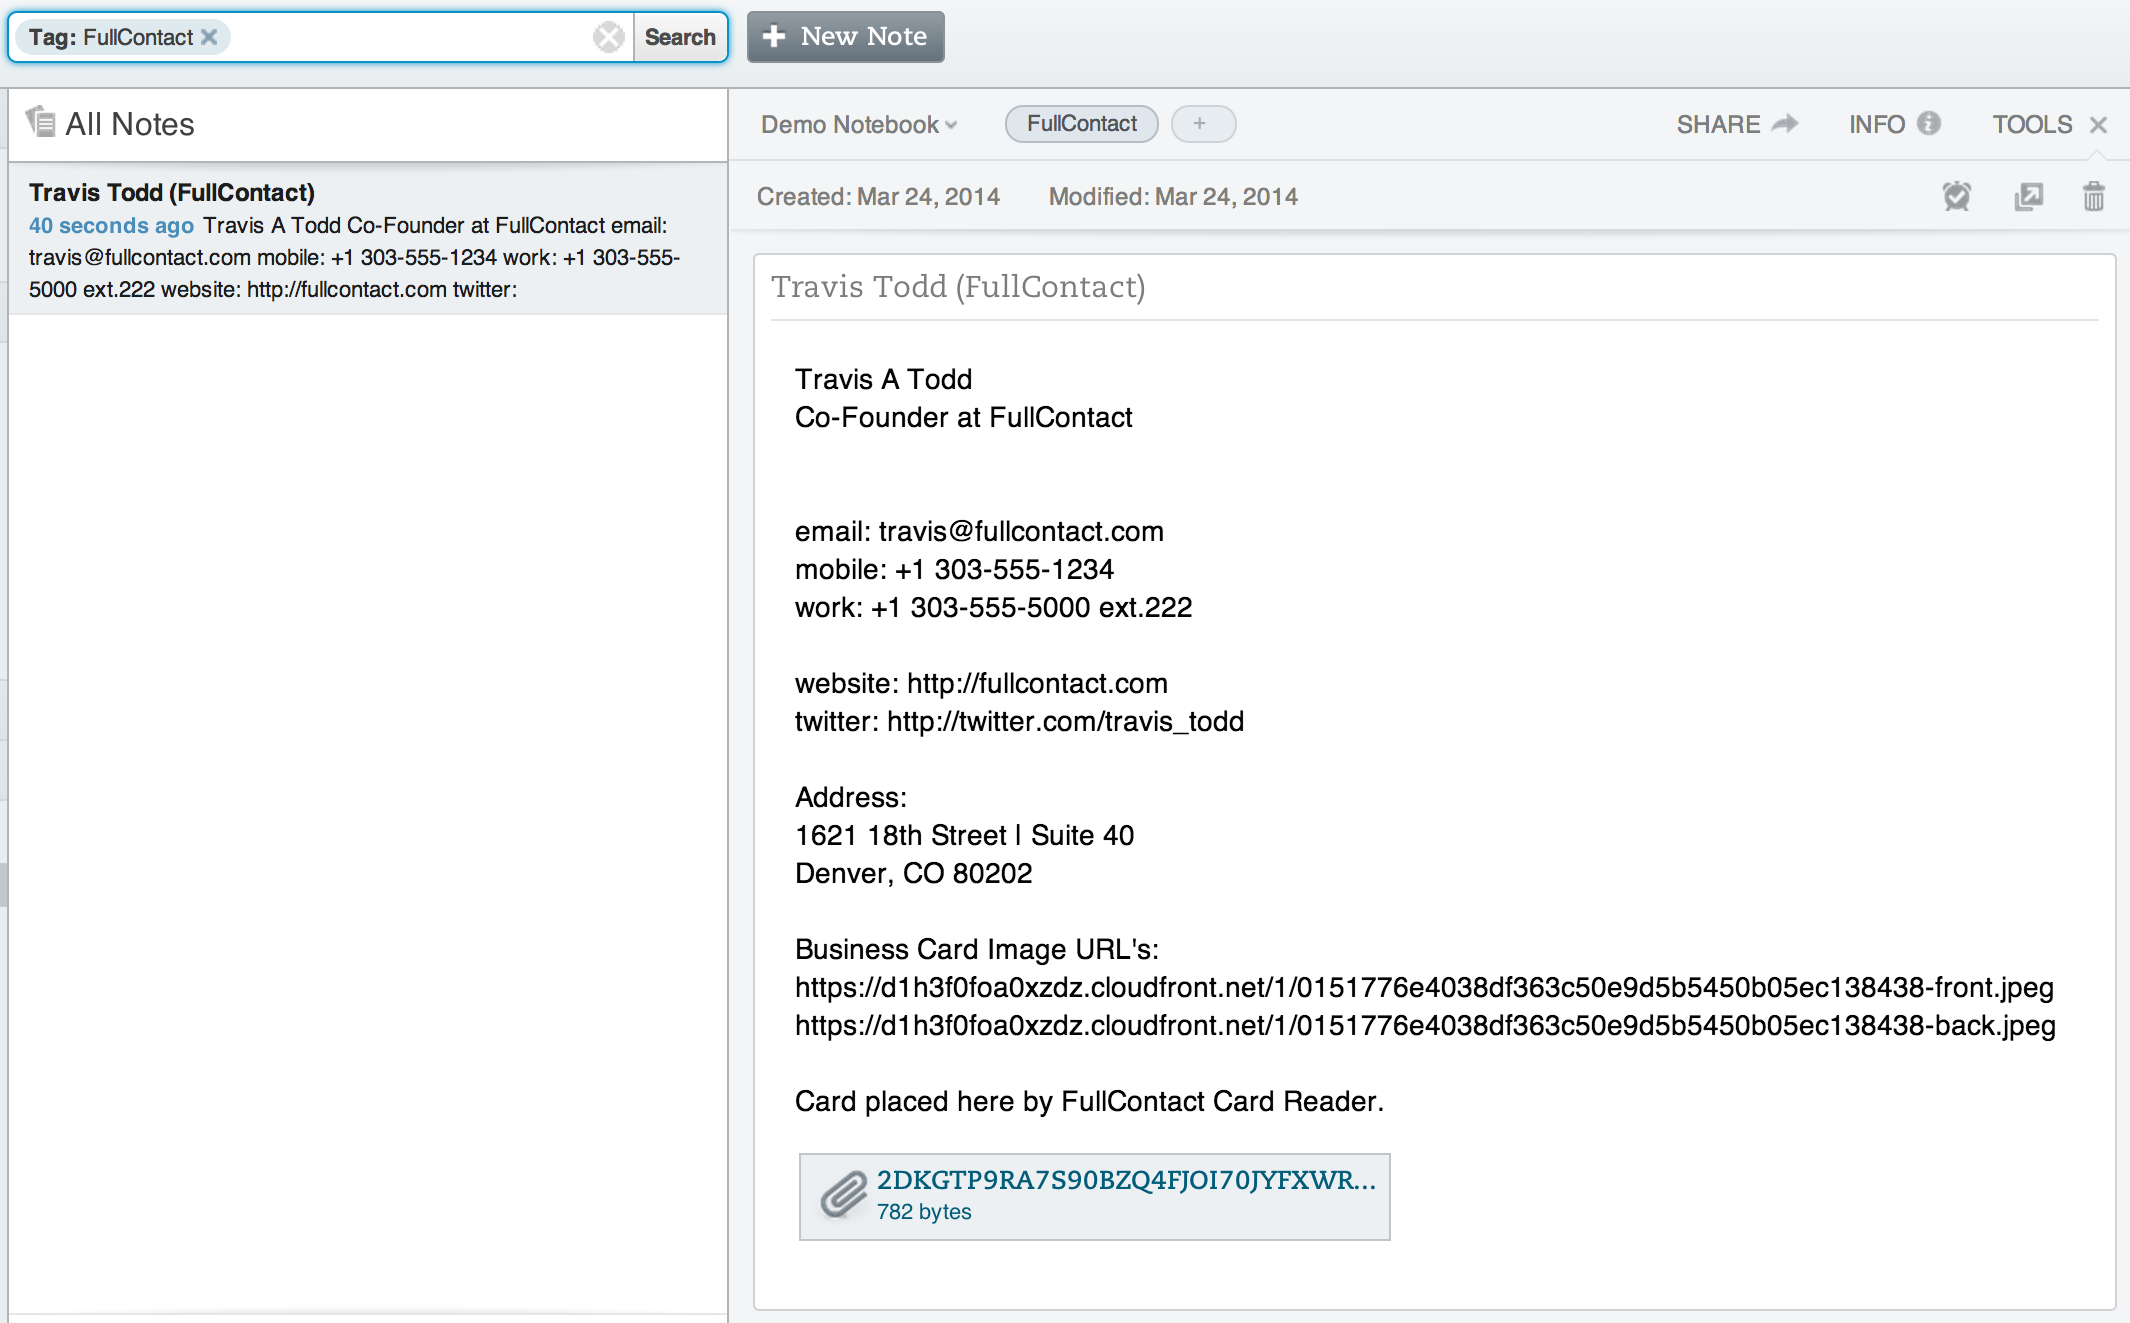
Step 4: Verify and Edit Contact Information
After Evernote has successfully scanned the business card, it’s important to review the captured information for accuracy. Occasionally, errors may occur during the OCR process, especially if the card has unique fonts or layouts. Take a moment to verify that all the contact details such as name, title, company, phone numbers, email addresses, and website URLs are correctly recognized.
In the event that some information is misread or missing, Evernote allows you to edit the text directly within the app. Simply tap on any contact field, make the necessary changes, and save the updated information.
Step 5: Organize and Tag Your Contacts
One of the significant advantages of digitizing your business cards with Evernote is the ability to easily organize and categorize your contacts. With Evernote’s powerful tagging system, you can create custom tags to classify contacts based on their industry, location, or any other criteria that is relevant to your needs.
To create a tag, navigate to the contact card within Evernote and select the “Tag” option. From there, you can either choose an existing tag or create a new one. By tagging your contacts, you can effortlessly filter and search for specific individuals or groups of contacts whenever you need them.
Step 6: Use Evernoteâ_x0080__x0099_s Search Functionality

The search functionality within Evernote is truly powerful. Once your business cards are scanned and organized, you can use the search bar located at the top of the app to quickly find specific contacts or even search for specific words within the card’s content. Whether you need to find a particular name, a company, or a specific keyword from a conversation, Evernote’s search functionality has you covered.
Step 7: Sync Your Contacts Across Devices
Another remarkable feature of Evernote is its ability to synchronize your contacts across multiple devices. By using Evernote’s sync functionality, you can access your digitized business cards on your computer, smartphone, or tablet seamlessly. This ensures that you have your contacts readily available whenever and wherever you need them, enhancing your productivity and efficiency.
Conclusion
Scanning business cards with Evernote is a game-changer for anyone looking to streamline their contact management process. By digitizing your business cards, you eliminate the need for physical copies, reduce clutter, and gain the ability to organize and search for contacts effortlessly. With Evernote, you can ensure that important connections are never lost or forgotten, and always at your fingertips. So, why continue to struggle with traditional paper-based contact management when you can harness the power of Evernote and take your business networking to the next level? Start scanning your business cards today and experience the convenience and efficiency of Evernote for yourself.
Ava Taylor’s passion for branding and marketing shines through in her dynamic writing. She brings a unique perspective with her background in event planning, infusing creativity into her content. When she’s not writing, Ava enjoys organizing community events and gatherings.