If you find yourself drowning in a pile of business cards from networking events, conferences, and meetings, you’re not alone. Managing these contacts can be a daunting task, but thankfully, Google Contacts has a feature that allows you to easily scan business cards and add them to your digital address book. In this article, we’ll walk you through the steps on how to scan business cards into Google Contacts, so you can have all your important contacts in one convenient place.
Setting Up Google Contacts
Before you can start scanning business cards, you’ll need to make sure you have Google Contacts set up on your device. Google Contacts is available as a standalone app on both Android and iOS devices, or you can access it through your Google account on a web browser.
Once you have Google Contacts installed or accessed, make sure you’re signed in with the same Google account that you want to sync your contacts to. This will ensure that the scanned business cards are directly added to your desired account.
Scanning Business Cards with the Google Contacts App
If you’re using an Android or iOS device, the easiest way to scan business cards into Google Contacts is by using the Google Contacts app. Follow the steps below to get started:
Step 1: Open the Google Contacts app
Locate the Google Contacts app on your home screen or app drawer and tap on the icon to launch it.
In the bottom-right corner of the screen, you’ll see a red “+” button. Tap on it to bring up the options for adding a new contact.
Step 3: Select “Scan QR code or Barcode”
From the menu that appears, choose the option that says “Scan QR code or Barcode”. This will activate the camera on your device, allowing you to scan the business card.
Step 4: Position the business card within the scanning frame
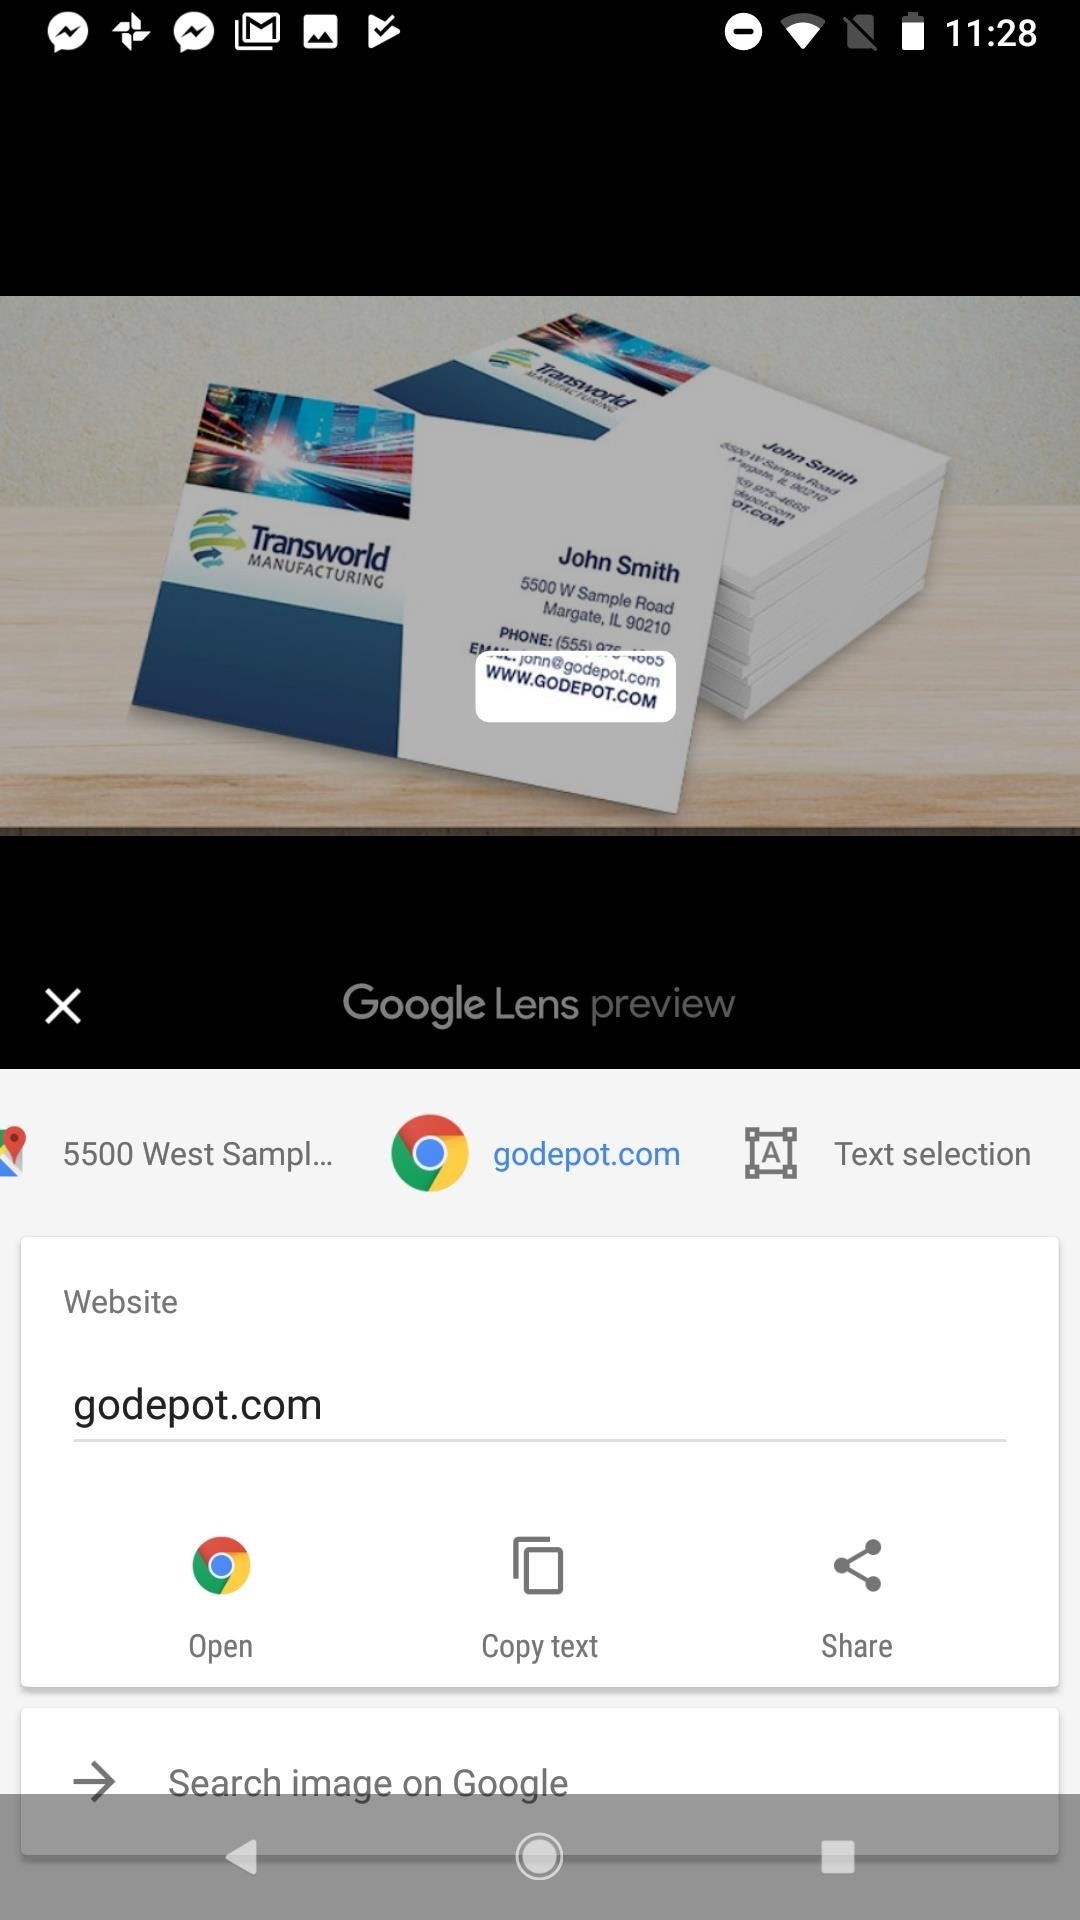
Hold your device steady and position the business card within the scanning frame. Make sure the entire card is visible and well-lit for best results.
Step 5: Wait for the app to scan the business card
Once the business card is positioned, the Google Contacts app will automatically scan it. This process should only take a few seconds.
Step 6: Review and edit the contact details
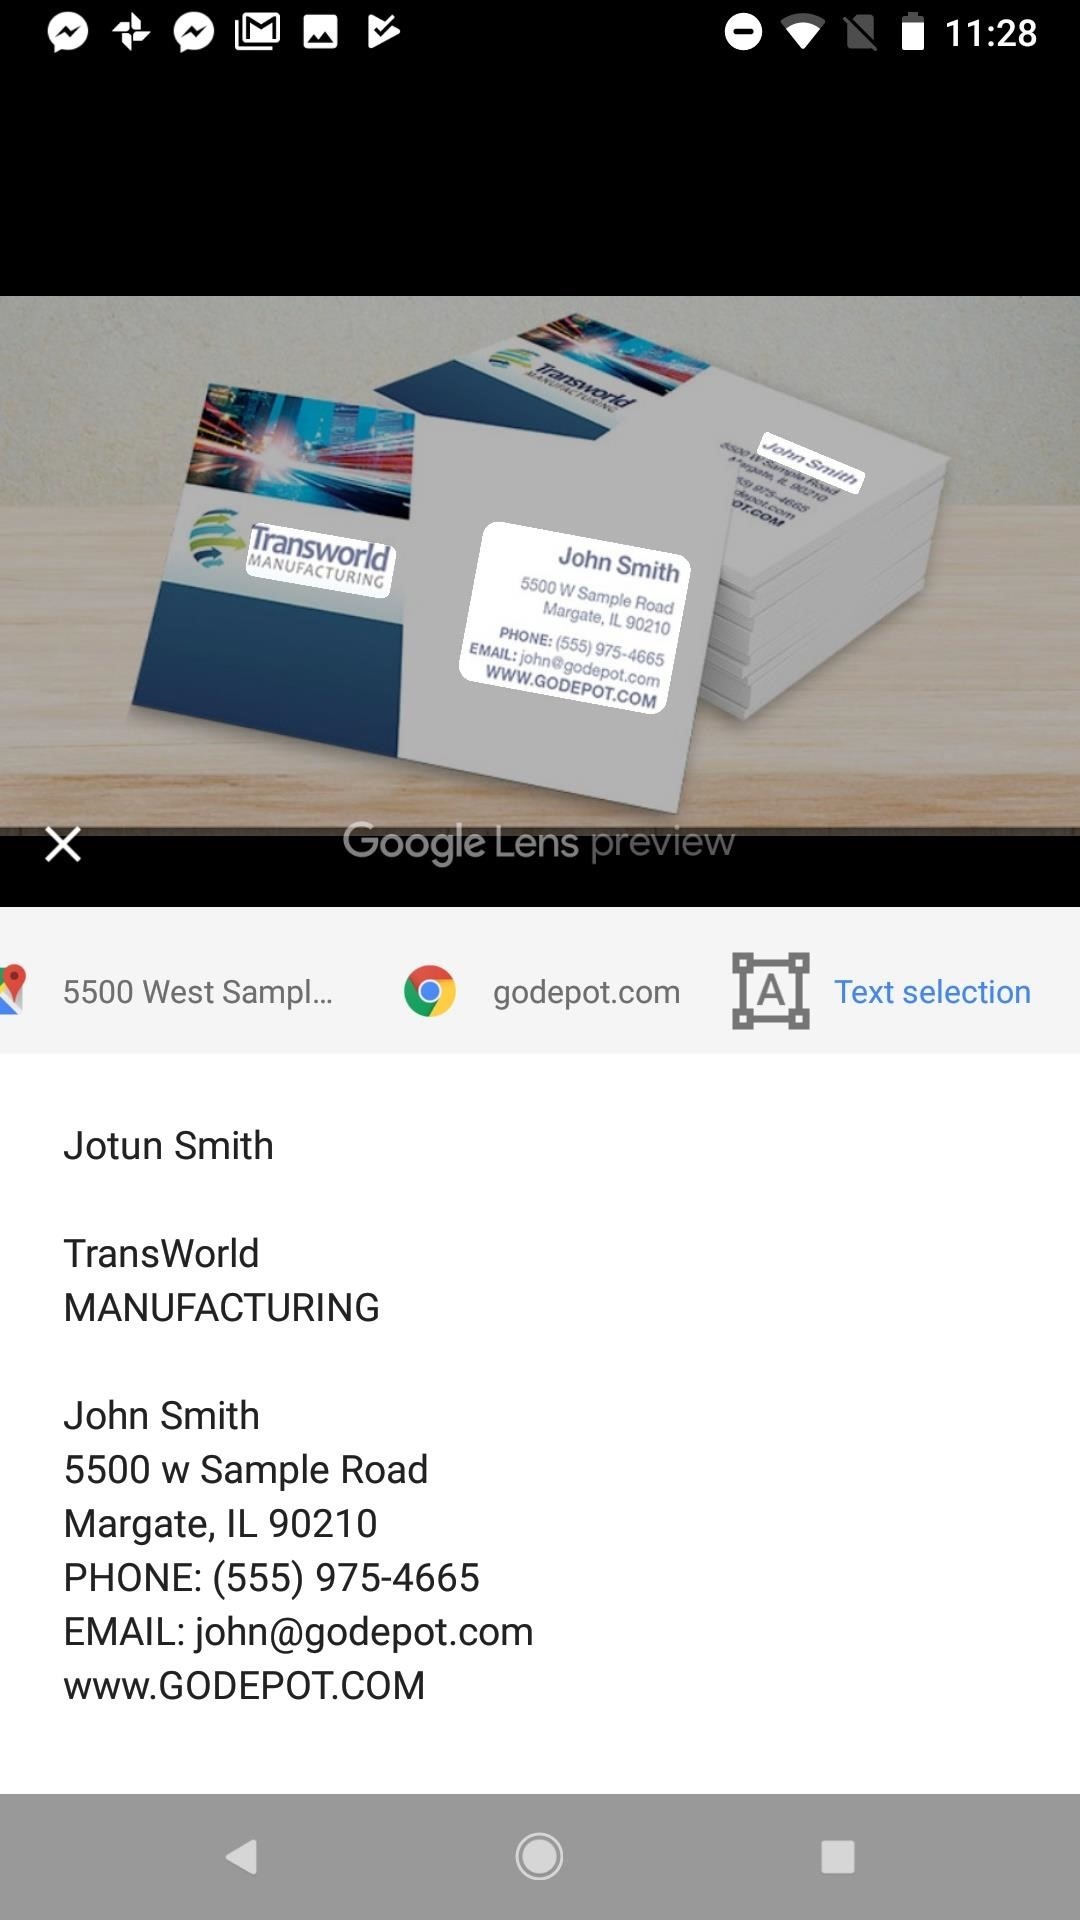
After the app has successfully scanned the business card, it will display the contact details it extracted from the card. Take a moment to review the details and make any necessary edits or additions.
Step 7: Save the contact to Google Contacts
Once you’re satisfied with the contact details, tap on the “Save” or “Add” button to save the contact to your Google Contacts. The contact will now be available and synced across all your devices associated with the same Google account.
Scanning Business Cards with Google Contacts on Web
If you prefer using Google Contacts on a web browser, follow the steps below to scan business cards directly from your computer:
Step 1: Open Google Contacts
Launch your preferred web browser and navigate to the Google Contacts website. Sign in with your Google account credentials if prompted.
On the left-hand side of the Google Contacts interface, you’ll see a red “+” button. Click on it to begin adding a new contact.
From the dropdown menu that appears, select the option that says “Scan” to activate the scanning feature.
Step 4: Position the business card within the scanning frame
Hold the business card steady and position it within the scanning frame displayed on your screen. Ensure that the entire card is visible and well-lit.
Step 5: Wait for the app to scan the business card
Similar to the mobile app, the Google Contacts web interface will automatically scan the business card once it’s positioned correctly. This process should only take a few seconds.
Step 6: Review and edit the contact details
After scanning, Google Contacts will display the extracted contact details from the card. Take a moment to review the information and make any necessary edits or additions.
Step 7: Save the contact to Google Contacts
Once you’re satisfied with the contact details, click on the “Save” button to save the contact to your Google Contacts. The contact will now be accessible across all your devices through your Google account.
Conclusion

Scanning business cards into Google Contacts is an efficient way to keep your contact information organized and easily accessible. Whether you prefer using the mobile app or the web interface, Google Contacts provides a seamless experience for adding contacts from business cards. By following the simple steps outlined in this article, you’ll be able to quickly digitize your important contacts, saving you time and eliminating the hassle of manually entering them. So, say goodbye to the cluttered pile of business cards and embrace the digital age with Google Contacts.
Samuel Anderson, a branding connoisseur, brings his knack for design and a strong marketing background to the forefront. He’s a voracious reader and enjoys delving into psychology, which he incorporates into his marketing strategies for business cards and brand development.