
Are you looking to create professional-looking business cards quickly and easily? Look no further! Microsoft Word 2013 offers a wide range of tools and features that make designing and printing business cards a breeze. In this article, we will guide you step-by-step on how to create stunning business cards right in Word 2013. So, let’s get started!
Getting Started

Before diving into the process, make sure you have Microsoft Word 2013 installed on your computer. Launch the software and follow these simple steps to create your own business cards.
Step 1: Choosing the Template
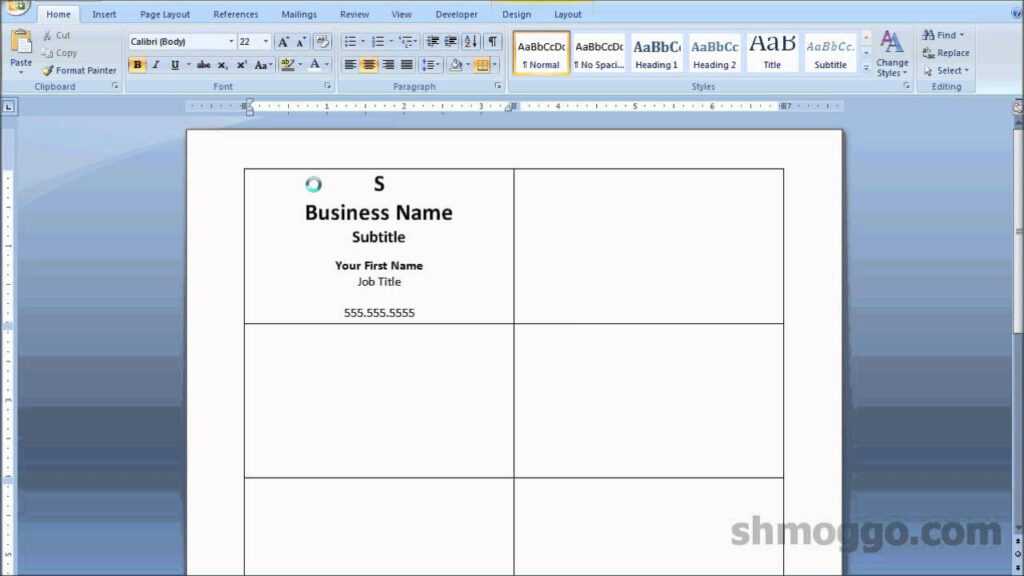
Start by opening Word 2013 and navigating to the “File” tab. Click on “New” to access the template gallery. In the search bar, type “business cards” and hit Enter. Word will display a variety of business card templates for you to choose from. Take your time to find a design that best suits your professional needs, or select a blank template if you prefer to create your design from scratch.
Step 2: Customizing the Design
Once you’ve chosen a template, it’s time to customize it to reflect your brand or personal style. Select the text placeholders and replace the default information with your own. Make sure to include your name, job title, company name, contact details, and any other relevant information you want to include on your business card.
To change the font style, size, or color, highlight the text you want to modify and use the options available on the “Home” tab. Experiment with different fonts and colors to find a combination that represents your unique brand identity. Remember to keep the text readable and avoid using too many different fonts, as it can make your business card look cluttered and unprofessional.
Step 3: Adding Your Logo and Images
To make your business card stand out, consider adding your logo or an image that represents your business. On the “Insert” tab, click on “Pictures” to select and insert your desired image. Resize and position the image accordingly, ensuring it doesn’t overpower the rest of the design elements.
If you have a logo saved on your computer, click on “Insert” and choose “Picture.” Locate the logo file and insert it into your business card template. Resize and position the logo as desired, making sure it complements your overall design.
Step 4: Finalizing the Design
Once you’re satisfied with the layout and content of your business card, double-check for any typos or errors. It’s essential to ensure your contact information is accurate and up to date.
To make your business card more visually appealing, you can add borders or apply formatting effects. Select the text box containing your contact information and navigate to the “Format” tab. Use the options available to experiment with borders, shading, or other formatting enhancements. Be cautious not to go overboard with these effects, as it may distract from the important information on your business card.
Printing Your Business Cards
With your business card design finalized, it’s time to print. Before hitting the print button, however, make sure you have the necessary supplies. You will need high-quality cardstock paper or pre-cut business card sheets, a printer with sufficient ink, and scissors or a paper cutter if needed.
Step 1: Setting up the Printer
Ensure that your printer is properly connected to your computer and turned on. Open the “Print” dialog by clicking on the “File” tab and selecting “Print.” In the settings, choose the appropriate printer and adjust any additional print settings, such as paper size and orientation, to match your business card design.
To check if your printer is correctly aligned, print a test page on regular paper and compare it to the business card sheet. Make any necessary adjustments in the print settings until the alignment is accurate.
Step 2: Printing
Load the cardstock or pre-cut business card sheets into your printer. Ensure that the sheets are properly positioned and secured to avoid any paper jams or printing errors. Once everything is set up, click on the “Print” button to start the printing process.
Depending on your printer and the number of business cards you are printing, the process may take some time. Be patient and avoid disturbing the printer until all the cards have been printed.
Step 3: Cutting and Final Touches
Once the printing is complete, carefully remove the printed business card sheets from the printer and let them dry for a few minutes. If you used regular cardstock, use scissors or a paper cutter to trim the cards along the provided guidelines.
If you opted for pre-cut business card sheets, follow the manufacturer’s instructions to separate the individual cards. Gently bend the sheet along the perforated lines to release the cards. Take your time to ensure clean and professional-looking edges.
Conclusion
Creating business cards in Word 2013 is an efficient and cost-effective way to showcase your professional brand. With its user-friendly interface and robust design tools, Word allows you to design customized business cards that reflect your personality and make a lasting impression on potential clients or business partners.
Remember, the key to an effective business card design is simplicity. Avoid overcrowding your card with excessive information or design elements. Focus on presenting the most critical details clearly and concisely, allowing recipients to locate and retain your contact information effortlessly. By following the steps outlined in this article, you can confidently create and print your own business cards using Word 2013, saving time and money in the process.
Isabella, a branding guru, merges her love for storytelling with her marketing expertise. Her fascination with cultural diversity and travel lends a global perspective to her writing about business cards and graphic design. In her free time, she explores new cuisines and documents her culinary adventures.